
As $DAYJOB has me working in a P25 radio system I’ve been meaning for some time to get the OP25 software going and build a P25 scanner. And now that the Raspberry Pi has sufficient horsepower to handle this task I thought this would make a fun little project.
I had a couple of SDRs on hand that would work well and the combination of a Raspberry Pi and SDR could be dedicated to the task of P25 scanner in the ham shack. My first rendition was using a Raspberry Pi 4, my trusty old HackRF One and the “rx.py” receiver that is part of the OP25 package.
I got it working and won’t bore you with those details as this ended up not being the permanent solution to the p25 scanner problem. I needed the Raspberry Pi 4 elsewhere and OP25 can use more horsepower. So I acquired a Raspberry Pi 5. The older “rx.py” receiver has some shortcomings and was quickly replaced by the more modern and superior “multi_rx.py” receiver, also part of the OP25 package.
While the “rx.py” receiver was a great way to get started and learn with OP25 it has enough shortcomings that I don’t recommend it for anything beyond that: a learning tool and stepping stone to getting going with “multi_rx.py“.
As such I am going to skip right to the final state in this description and hope that it may be of some use to other folks wanting a P25 scanner.
The computer: Raspberry Pi 5
I bought a Raspberry Pi 5 with 8GB of ram, a case, a fan and a power supply. While 4GB of memory would have been more than sufficient, 8GB did not add a lot to the cost and it makes the device more usable for other tasks down the road should it be retired from P25 service and repurposed elsewhere.
The radio: HackRF One SDR
I had two SDRs already in hand. A HackRF One and an Airspy Mini. Either would do nicely for my purpose. I chose to start with the HackRF. I’ve been meaning to add a TCXO (temperature compensated crystal oscillator) to my HackRF so I performed that work as a prerequisite to this project using the TCXO from Nooelec for the HackRF. The on-board oscillator in the HackRF is pretty good but for ~$30 I would have something more stable which could only be helpful at ~800 MHz which is where our local P25 system lives.
The build
I downloaded the latest Raspberry Pi OS and got that up and running. A simple task and I won’t go into those details here. Now for OP25. This looked like it would take some time as documentation is not plentiful. Information about the project can be found here:
There is a good wiki here:
Then I found this very well-written how-to on getting started with OP25 and I used it, which saved me much time and effort. Many thanks to John, KN4FMV, for taking the time to write this up and for doing such an excellent job of it! It gave me a running start with OP25.
To get this going you will need to know some technical details about the P25 radio system that you intend to monitor. If you’re lucky it will be listed in the databases at Radio Reference. That will save you trying to figure out the the WACN, System ID, RFSS, NAC, control channel frequencies and talk groups.
Using John’s tutorial I now had a P25 scanner running using “rx.py” and monitoring the local site of our local P25 radio system. As I am in the middle of a big city and as the city is very well served with several P25 sites (in a simulcast configuration) I have no problem with received signal strength.
But I do live in a valley and the ham shack is in the basement so I decided that taking a feed from my television yagi would work very well for me, despite the facts that the antenna is for the wrong band and is pointing in the wrong direction and the feed line impedance is 75 ohms. The mast-mounted LNA would more than make up for any deficiencies as it was a broadband unit that covered the 700 MHz public safety band. This ended working very will given that the P25 radio sites here in the city are very strong to begin with.
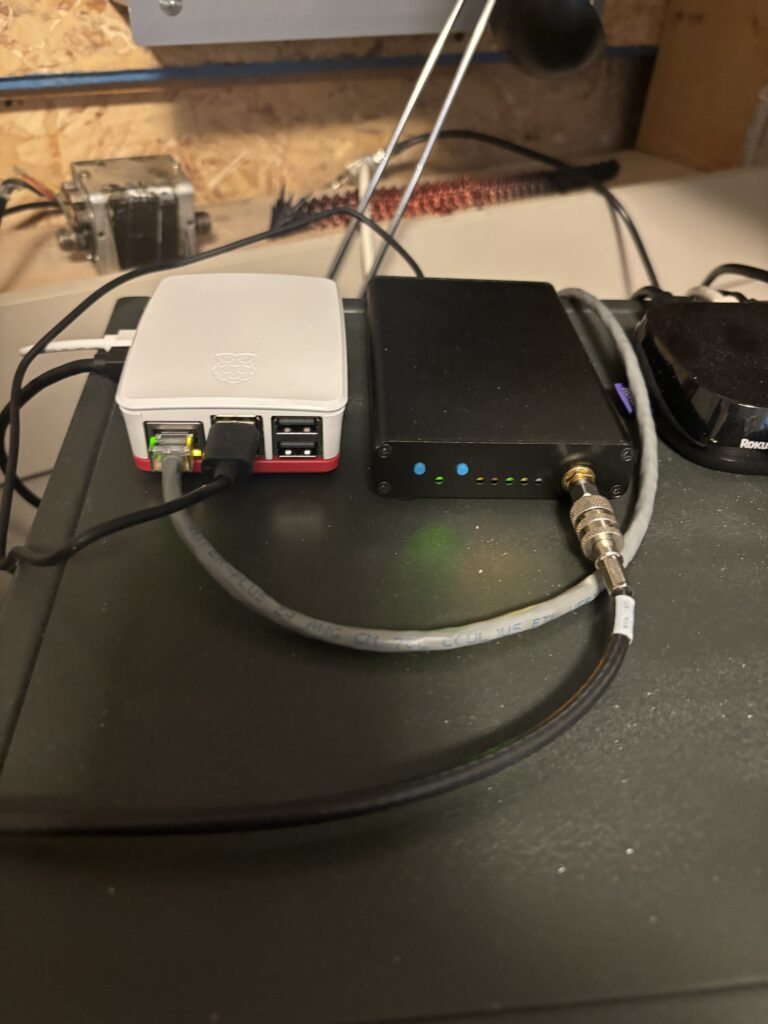
Here is the Raspberry Pi 5 (left) and HackRF (right) perched on top of my Hammarlund HQ-129X and working very well.
Now the fun would begin: multi_rx.py
After some time using the “rx.py” receiver its’ deficiencies became apparent. There were audio artifacts. The configuration lacked flexibility. There’s no config file, one just plunks everything onto the command like. There’s no facility to deal with a control channel that moves about, as ours here do. And there’s more.
The author has stated that the code in “multi_rx.py” is better at packet re-assembly and that its’ performance is better. And there is a very flexible configuration file. It also supports multiple SDRs so one can monitor multiple systems.
That was that. I needed to move to “multi_rx.py”. The challenge here was that there wasn’t much for documentation other than some sample config files. Using those as a starting point and coupled with what I already knew about P25 systems in general and ours in particular I set to work.
This took a good amount of time in experimenting. I was also slightly hobbled by my lack of in-depth knowledge of Linux. I am a BSD guy and have been since 1992 or so. I’ve picked up a few things about Linux over the years via casual exposure but was missing a few bits of knowledge as it pertained to this project, like managing the screaming horror of systemd, for one.
Without going into all the detail I will say that I developed a working .json file (much trial and error here!) from the examples provided with the OP25 distribution. I got the audio sub-system sorted out. I built a talk group file, thanks to the information provided at Radio Reference. The web interface is useful once you have your configuration sorted out.
This would be a good time to thank the local scanner community for their diligent efforts to document these things! To build my scanner I needed control channel and talk group info and it was all there.
It’s working well and I am pleased with the results.