This post is the first part of who knows how many detailing the restoration to service of what is a very special radio to me, an RCA AR-88. The saga began in February of this year.
The goal is for completion of all work the end of September at the very latest. Ready for the winter radio season and ready to provide not just operating and listening pleasure but the visual and olfactory ambiance that can only come from an old vacuum tube radio in the ham shack.
Acquisition
In February 2025 my pal Neil, VE6TCK, became aware of some radio equipment from the estate of a Silent Key, Frank Smith, VE6EW in Medicine Hat, AB. It included an AR-88F that looked to be in very good physical condition. As Neil already had an AR-88F and a CR-91, he figured, rightly, that I would be interested in this AR-88F. I had an AR-88LF when I was young, before I was a ham. I foolishly sold it and I immediately regretted that decision then and for the following four decades.
I’ve wanted another AR-88 ever since. Here was my chance to get one at a very reasonable price. The catch was that the widow wanted rid of both racks and all the gear in them, pictured below. To get that AR-88 we had to take it all away. As well, Medicine Hat is more than a five hour drive from Edmonton. So while the price was very attractive there was some additional time, expense and effort required. It was worth it as this radio is one of the special ones for me and this one was in good physical condition. Most of these are not.
Based merely on the photo below and a very brief description from a local ham a plan was formulated. When spring arrived, I, along with my XYL Donna and our friend Neil would make the journey to Medicine Hat and bring this equipment home. I wanted the AR-88F, Neil was interested in the Italian Geloso radio above it and we figured some of the other pieces may be of interest to others that we knew.
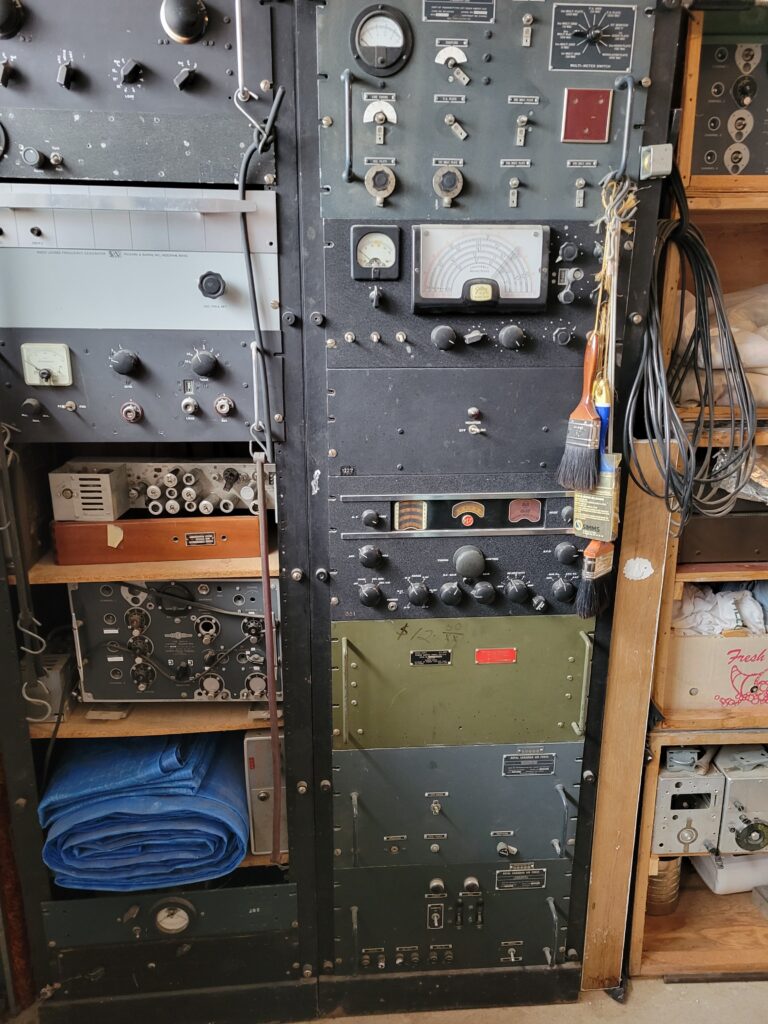
There it is as found in a garage in Medicine Hat, AB. The old ’88 looks good after sitting there for who know how many decades! The two racks pictured, along with all the equipment in them, had to go. This was our task that weekend.
We departed Edmonton on the Saturday and enjoyed a warm, sunny drive to the far southeast of Alberta, arriving around 1500h. That gave is enough time to get everything removed from the racks and the lot of it loaded up. We were not initially certain we would be able to accomplish everything on Saturday and were very pleased that we were able to do so! The next day we could eat breakfast and hit the road for home.
Inspection and evaluation
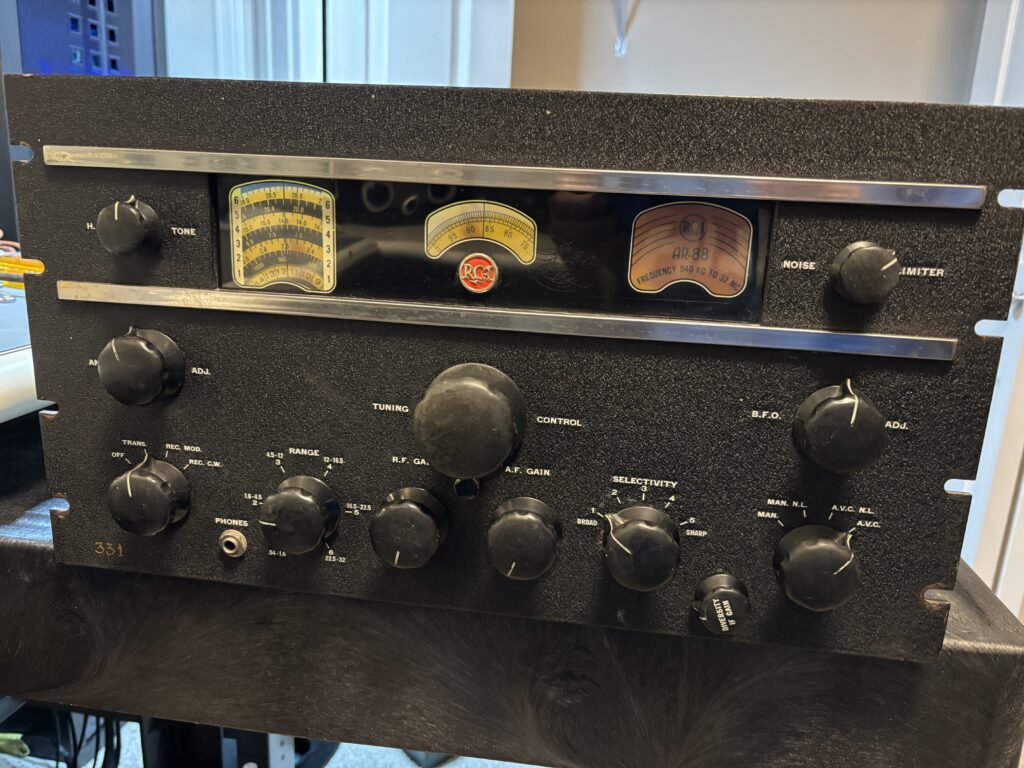
Back in my ham shack in Edmonton the initial inspection was good. The unit is complete and nothing was missing or damaged.
Some small modifications had been performed by some prior owner. Antenna connectors had been added on the rear apron: one BNC and one SO-239, but a good job was done on those. A chassis mount fuse holder has also been added and a proper job was made if that. This was all acceptable to me and would be left in place.
The front panel is in excellent condition. All knobs are the correct ones and in good condition. The dials and dial windows are in very good condition. All of that was very good news as I would only have to deal with electrical repairs, which is the fun part.
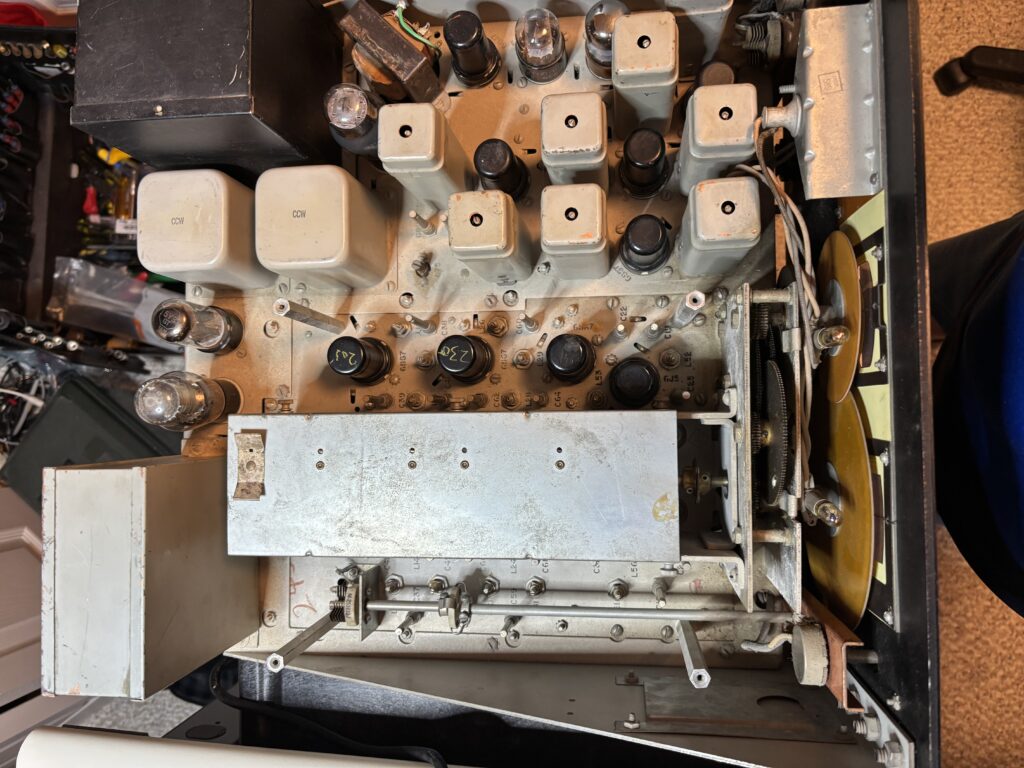
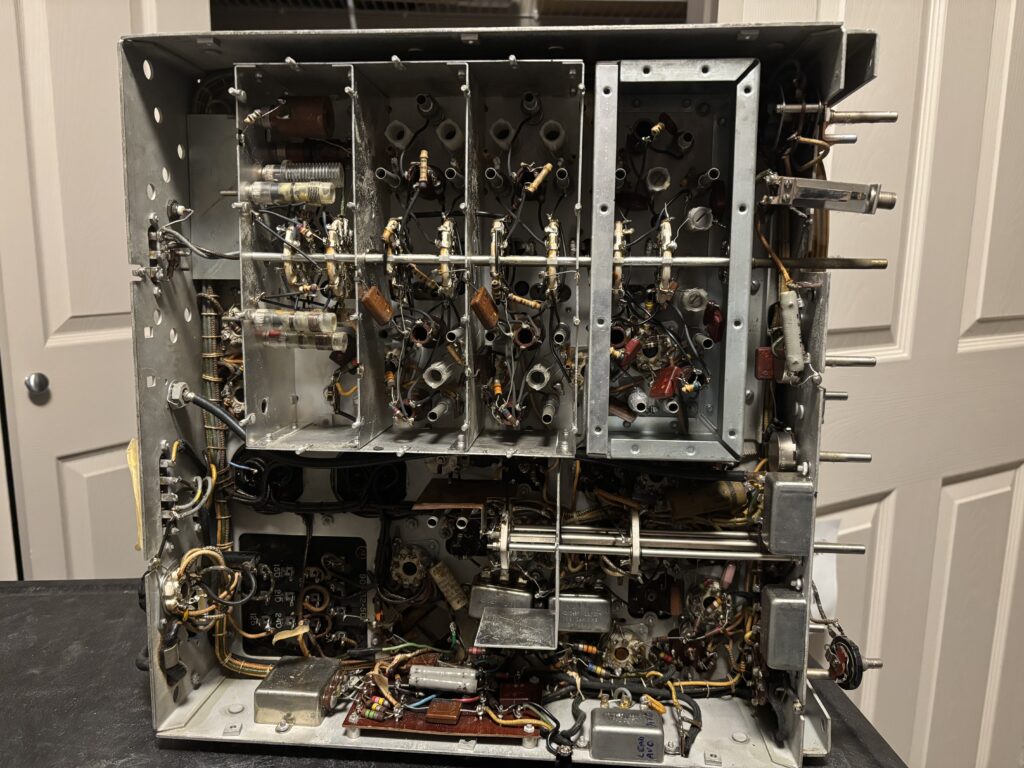
There’s the topside of the chassis with the RF shield removed to get at the tubes that live under it. All the tubes were removed, cleaned and tested. There was no leakage from the power supply inductors, power transformer or main filter capacitor(s).
The IF gain pot is missing it’s housing. The audio output transformer had been replaced at some point. It has only one secondary winding and I don’t yet know what impedance it is. I assume something low. That will need to be understood at some point.
Next up is disassembly. There will be a lot of screws, washers and nuts to keep track of. As I take things apart I put all the fastening hardware in plastic bags with a note in each one to remind me from whence it came. When reassembly time comes some weeks or months from now this will be invaluable.
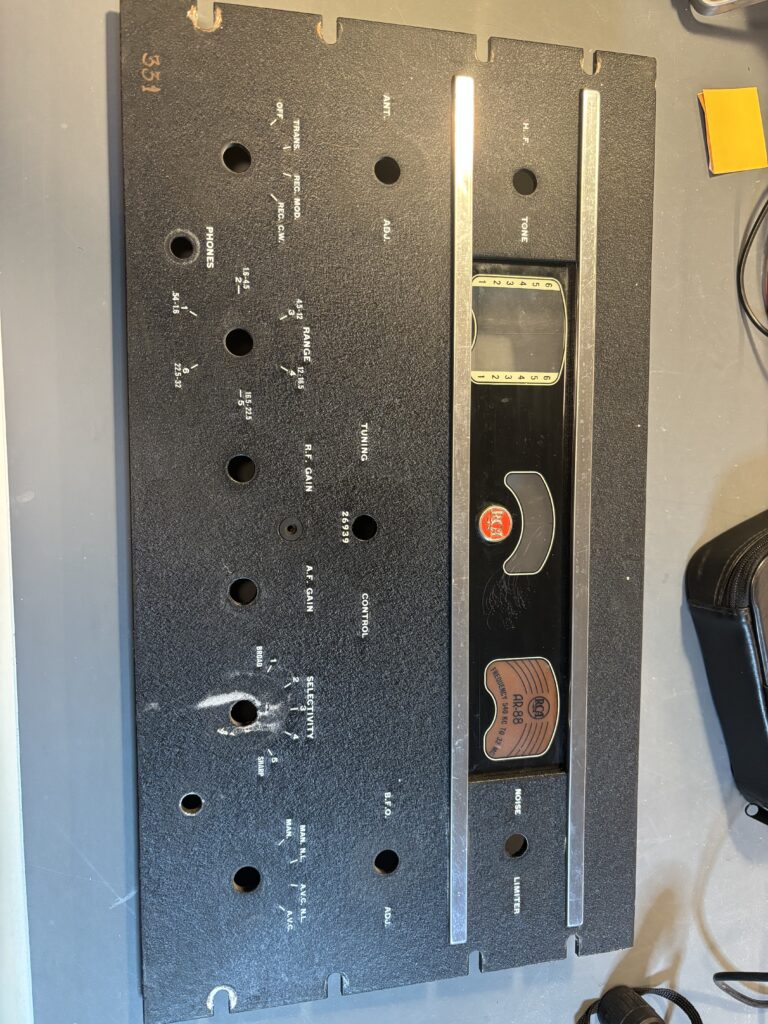
The knobs and front panel were removed first. The white material behind the “selectivity” knob was from the deteriorating felt spacer behind the knob. It wiped off with warm water.
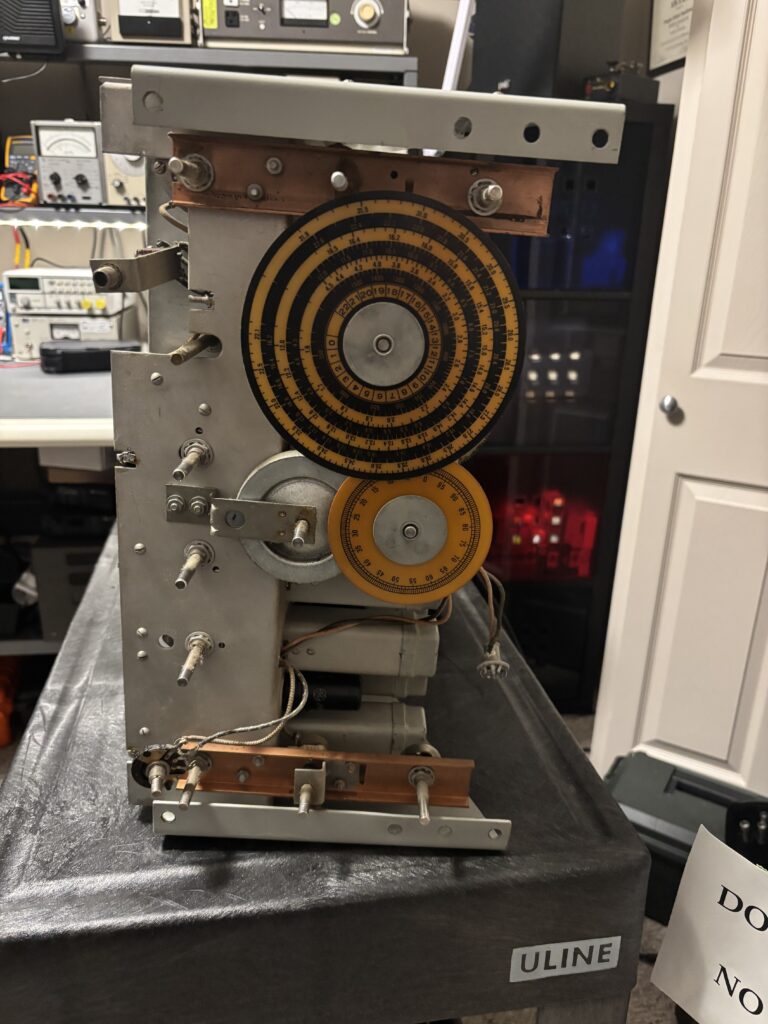
Other than some dust everything under the front panel looks really good! The mechanical construction of these radios is excellent. Based on the condition of the dials I don’t think I will need to replace these but Radio Daze does make replacement dials if needed.
The two covers on the RF compartments underneath were then removed. How many decades has it been since anyone was inside these? Everything looks in excellent condition, even the wafer switch contacts are clean. They will still need a cleaning and some exercise to work properly again.
Before I went any further I needed to know if the radio worked at all. I eased it back to life on my Variac over a period of some hours. I was able to receive local AM BCB stations! The audio was extremely low but it wasn’t distorted. Switches were naturally fiddly. But RF went in and AF came out. Now I can begin the repair and restoration work!
Scope of work
The following tasks will be undertaken as part of this project:
- replace all paper capacitors
- replace all micamold capacitors
- replace power supply filter capacitors if needed
- replace all resistors that are out of tolerance
- replace all vacuum tubes with NOS
- clean gearbox
- full IF and RF aligment
- verification that the replacement AF output transformer is the proper type, replace if not
- clean front panel, knobs, dials and windows, repair or replace as needed
- replace dial lamps
- clean chassis, front panel and knobs
I have the capacitors I need for this job. I still need to acquire some resistors and a full set of tubes.
Off we go… more to come as the project progresses…